Difference between revisions of "Newsletter Manager"
From Phoenix Cart User Guide
PeterRobert (talk | contribs) |
PeterRobert (talk | contribs) |
||
| Line 16: | Line 16: | ||
**Enter a '''Newsletter Title:''' | **Enter a '''Newsletter Title:''' | ||
**Enter '''Content:''' | **Enter '''Content:''' | ||
| − | **Click <span class="btn- | + | **Click <span class="btn-green">Save</span> to see this: |
<div class="mainpage_box"> | <div class="mainpage_box"> | ||
[[File:newslettermanager2.png|link=]] | [[File:newslettermanager2.png|link=]] | ||
</div> | </div> | ||
*This shows a red cross in the '''Sent''' column indicating that it has not yet been sent. | *This shows a red cross in the '''Sent''' column indicating that it has not yet been sent. | ||
| − | *This also shows '''Unlocked''' in the '''Status''' column indicating that it is not yet ready to be sent - this helps prevent sending newsletters by mistake. | + | *This also shows a red '''Unlocked''' icon in the '''Status''' column indicating that it is not yet ready to be sent - this helps prevent sending newsletters by mistake. |
*Click <span class="btn-blue">Lock</span> to see this: | *Click <span class="btn-blue">Lock</span> to see this: | ||
<div class="mainpage_box"> | <div class="mainpage_box"> | ||
[[File:newslettermanager3.png|link=]] | [[File:newslettermanager3.png|link=]] | ||
</div> | </div> | ||
| − | * | + | *This now shows a green'''Locked''' icon in the '''Status''' column indicating that it can now be edited, deleted or sent. |
**Click <span class="btn-blue">Send</span> to see this: | **Click <span class="btn-blue">Send</span> to see this: | ||
<div class="mainpage_box"> | <div class="mainpage_box"> | ||
| Line 32: | Line 32: | ||
</div> | </div> | ||
*This shows how many customers will receive the newsletter, in this example, i.e. the number of customers who have opted to receive newsletters on the create account page when they created an account. | *This shows how many customers will receive the newsletter, in this example, i.e. the number of customers who have opted to receive newsletters on the create account page when they created an account. | ||
| − | *Click <span class="btn- | + | *Click <span class="btn-green">Send</span> to send the email. |
Revision as of 06:04, 29 January 2020
<historylink type="back">🠈 Back</historylink> 🠉 ADMINISTRATION
From admin go to Tools → Newsletter Manager to see this:

- Click New Newsletter to see this:
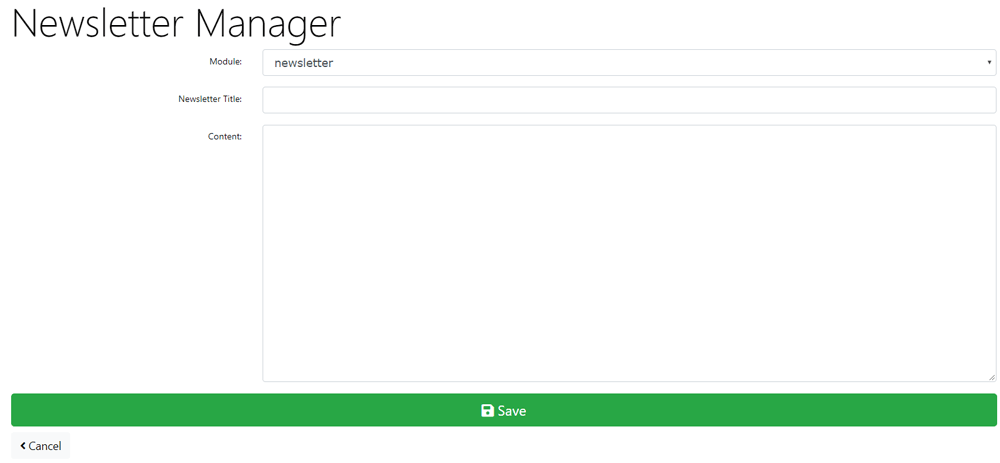
- The Newsletter Manager can be used to send emails to customers that have opted to receive newsletters on the create account page when they created an account and to customers who have opted to receive product notifications via the Product Notifications box module - Modules → Boxes - or checkout_success content module - Modules → Content if these modules are installed and enabled..
- Choose to create a newsletter email or a product_notification email from the Module: drop down menu.
- In this first example a newsletter email has been chosen.
- Enter a Newsletter Title:
- Enter Content:
- Click Save to see this:
- Choose to create a newsletter email or a product_notification email from the Module: drop down menu.

- This shows a red cross in the Sent column indicating that it has not yet been sent.
- This also shows a red Unlocked icon in the Status column indicating that it is not yet ready to be sent - this helps prevent sending newsletters by mistake.
- Click Lock to see this:
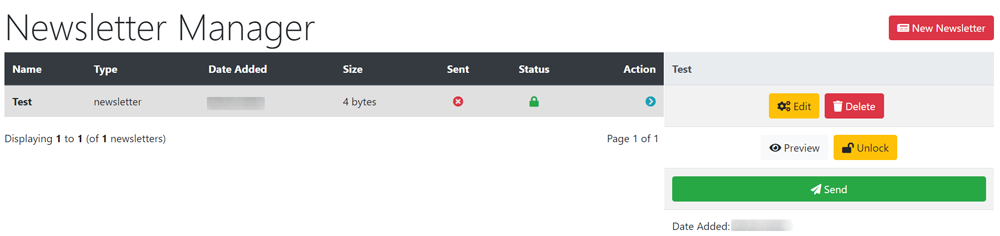
- This now shows a greenLocked icon in the Status column indicating that it can now be edited, deleted or sent.
- Click Send to see this:
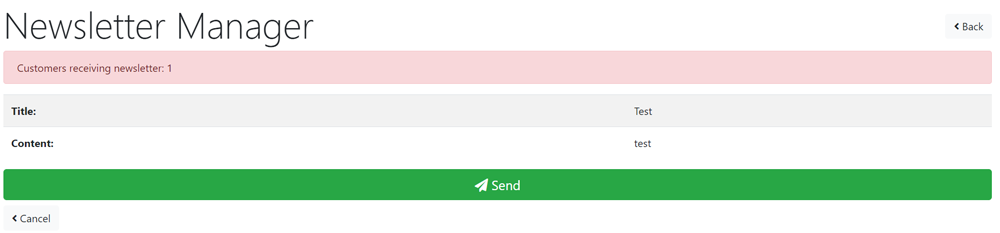
- This shows how many customers will receive the newsletter, in this example, i.e. the number of customers who have opted to receive newsletters on the create account page when they created an account.
- Click Send to send the email.
- In this second example a product_notification email has been created and locked.
- Click Send to see this:
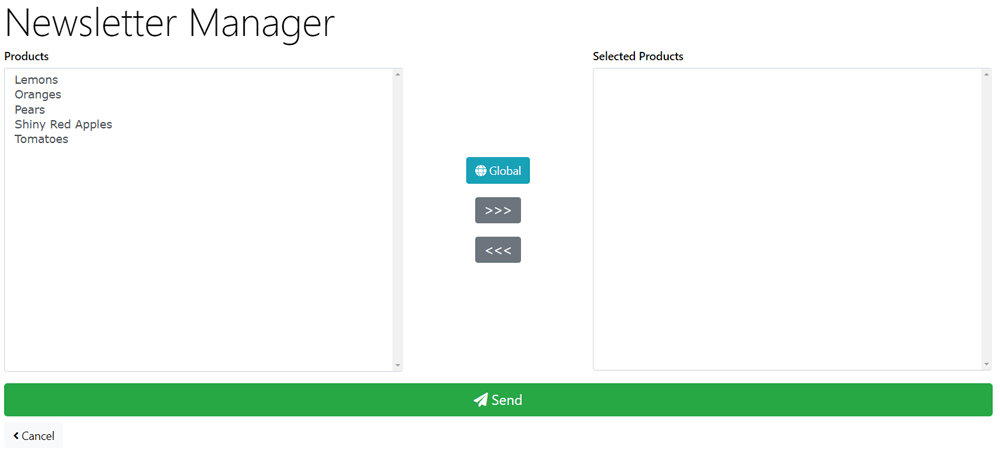
- Customers can opt to receive global product notifications in the checkout success content module i.e. notifications that refer generally to all products in which case:
- Click Global to see this:
- Click Send to send the email.
- Customers also opt to receive specific product notifications in which case:
- Click a product in Products panel to select it.
- Click >>> to move the product to the Selected Products panel.
- Click Send to see this:
- Click Send to send the email.

Please visit again soon for additions and changes
Phoenix Cart User Guide, like CE Phoenix Cart, is free to use but is maintained by unpaid volunteers.
All other content is the reserved Intellectual Property and Copyright of phoenixcart.org
