Difference between revisions of "Set up Tax Classes"
PeterRobert (talk | contribs) |
PeterRobert (talk | contribs) |
||
| (19 intermediate revisions by the same user not shown) | |||
| Line 1: | Line 1: | ||
| − | < | + | <div class="btn btn-grey btn-back">{{#fas:arrow-left}} Back</div> <div class="btn btn-grey btn-setup-shop">{{#fas:play-square}} [[Set_Up_Store|Set Up Store]]</div> |
| − | < | ||
<hr> | <hr> | ||
| − | From admin dashboard go to '''Locations / Taxes → Tax Classes''' - you will see this: | + | __TOC__ |
| + | __FORCETOC__ | ||
| + | From admin dashboard go to [[File:adminnavbartax.png|link=]] '''Locations / Taxes → Tax Classes''' - you will see this: | ||
<div class="mainpage_box"> | <div class="mainpage_box"> | ||
| − | [[File:taxclasses. | + | [[File:taxclasses.jpg|link=|1500px]] |
</div> | </div> | ||
| − | + | ==='''Tax Classes'''=== | |
| + | This shows the one Tax Class installed by default. | ||
| + | Tax Classes are the different taxes that apply to the different goods and services sold in the store. | ||
| + | These different Tax Classes can then be assigned to different products when products are entered to automatically apply the correct tax class to the correct product. | ||
| − | + | For examples: | |
| + | *Standard Tax Goods & Services | ||
| + | *Reduced Tax Goods & Services | ||
| + | *Zero Tax Goods & Services | ||
| − | *Click <span class="btn- | + | |
| + | ---- | ||
| + | ==='''New Tax Class'''=== | ||
| + | Edit or Set up more tax classes if required. | ||
| + | |||
| + | *Click <span class="btn-red">New Tax Class</span> | ||
*Enter a '''Name'''. | *Enter a '''Name'''. | ||
*Enter a '''Description'''. | *Enter a '''Description'''. | ||
| − | *Click <span class="btn- | + | *Click <span class="btn-green">Save</span> |
| + | |||
| + | |||
| + | The '''Tax Rate''' (percentage %) is set in the next step <big>'''[[Set up Tax Rates]]'''</big> | ||
| + | |||
| + | <!-- | ||
| + | ---- | ||
| + | |||
| + | |||
| + | <BIG>'''[https://www.youtube.com/watch?v=4ClT3QsY2ys Watch on YouTube]'''</BIG> | ||
| + | --> | ||
<hr> | <hr> | ||
| − | <span class="btn-grey">[[Set_up_Tax_Zones| | + | <span class="btn-grey btn-prev">{{#fas:arrow-left}} [[Set_up_Tax_Zones|Previous Step]]</span> |
| − | <span class="btn-grey">[[Set_up_Tax_Rates|Next Step | + | <span class="btn-grey btn-next">[[Set_up_Tax_Rates|Next Step]] {{#fas:arrow-right}}</span> |
<hr> | <hr> | ||
| + | {{Pro}} | ||
| + | {{Forum}} | ||
{{Contribute}} | {{Contribute}} | ||
Latest revision as of 08:28, 6 September 2024
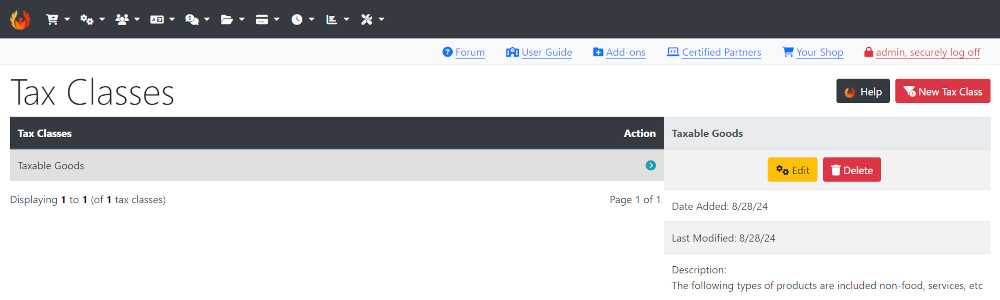
From admin dashboard go to  Locations / Taxes → Tax Classes - you will see this:
Tax Classes
This shows the one Tax Class installed by default. Tax Classes are the different taxes that apply to the different goods and services sold in the store. These different Tax Classes can then be assigned to different products when products are entered to automatically apply the correct tax class to the correct product.
For examples:
- Standard Tax Goods & Services
- Reduced Tax Goods & Services
- Zero Tax Goods & Services
New Tax Class
Edit or Set up more tax classes if required.
- Click New Tax Class
- Enter a Name.
- Enter a Description.
- Click Save
The Tax Rate (percentage %) is set in the next step Set up Tax Rates
Many Addons and Extensions available in the CE Phoenix Cart Addons Library
If help is needed, support is available in the CE Phoenix Cart Support Forum
Phoenix Cart User Guide, like CE Phoenix Cart, is free to use but is maintained by unpaid volunteers.
All other content is the reserved Intellectual Property and Copyright of phoenixcart.org
