Difference between revisions of "How to Install"
From Phoenix Cart User Guide
PeterRobert (talk | contribs) |
PeterRobert (talk | contribs) |
||
| Line 85: | Line 85: | ||
<center>[[File:adminlogin.png|link=]]</center> | <center>[[File:adminlogin.png|link=]]</center> | ||
</div> | </div> | ||
| + | |||
| + | See '''[[ADMINISTRATION]]''' for the complete user guide to Admin Dashboard. | ||
Revision as of 06:54, 28 May 2020
<historylink type="back">🠈 Back</historylink> 🠉 DOWNLOAD & INSTALL
- Open web browsing software - enter the web address of your website in the address bar - e.g
yoursite.com
- The first CE Phoenix installation Welcome page will open - you will see this:

- Ensure all Server Capabilities are checked with a green thumbs up to proceed. If not, contact your host server.
- Click Start the installation procedure
- The next CE Phoenix Step 1 installation page will open:

- Complete the form.
- For Database Server enter the default of localhost which is most commonly used by hosts otherwise your host will provide the correct value if the default is incorrect.
- Enter the Database Username, Password and Database Name that were created when the database was created.
- Choose Import Sample Data to install sample products which can be removed later. This is useful for first time users to see how the shop displays and works.
- Click Continue To Step 2
- The next CE Phoenix Step 2 installation page will open:

- It will automatically show your website address (WWW Address) - check the address and change the http to https if you have already created a SSL certificate.
- It will also show the path to your website on the host server (Webserver Root Directory) - make a record of this.
- Click Continue To Step 3
- The next CE Phoenix Step 3 installation page will open:

- Enter your Store Name - customers will see this but can be changed at any time.
- Enter your Store Owner Name - customers will see this but can be changed at any time.
- Enter your Store Owner E-Mail Address - this will be used in emails but can be changed at any time.
- Create Administrator Username and Administrator Password - these will used to securely log in to the administration section of the website not accessible to the public - save these.
- Enter a secure/random name for Administration Directory Name - make a record of this.
- Select a Time Zone
- Click Continue To Step 4
- The final CE Phoenix Step 4 installation page will open:
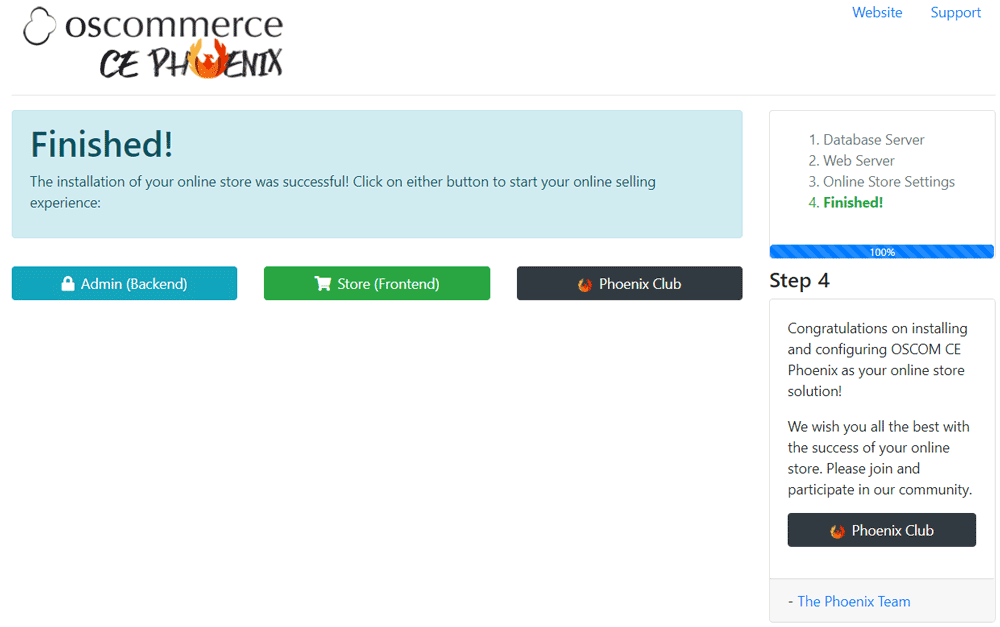
- Three buttons will show on this page.
- Administration Tool (Backend) takes you to the Admin of your website, it is not visible or accessible to the public, you will need your administrator username and password to access.
- Online Store (Frontend) takes you to the Catalog index page also known as the Shop, this is visible and accessible to the public.
- Phoenix Club takes you to the support forum where you can join the supporter's club for club membership benefits such as free add-ons to extend the functionality of your shop.
- Click the Administration Tool (Backend) button to go to the Admin Dashboard to secure the website in the next step.
- You will see this to log in.

See ADMINISTRATION for the complete user guide to Admin Dashboard.
Phoenix Cart User Guide, like CE Phoenix Cart, is free to use but is maintained by unpaid volunteers.
All other content is the reserved Intellectual Property and Copyright of phoenixcart.org
